A+ Tec is a Saturday school specialising in mathematics and science tutoring. While working there part-time as a teacher, I was approached about making a game to help KS2 students practice their maths in a more enjoyable and fun manner. The hope was that, in presenting the maths as a game, students would be more likely to engage with the learning. The game would be similar to a crossword puzzle, except that numbers would replace the words and the hints would be maths equations that the students would need to solve. This sounded like something that I would be capable of doing (of course with some learning along the way), so I accepted the task.
(Later on, the scope of the project increased to include other forms of maths games, as well as other subjects; however, these additional features were never implemented.)
Creating the puzzles
To accommodate for different skill levels present at KS2, two difficulties were created for the crossnumber puzzle game. In the easy difficulty, answers are 1-3 digits long and divisors are one digit only. Hard difficulty has answers 1-6 digits long and double digit divisors. Each difficulty also has its own pool of puzzle templates.
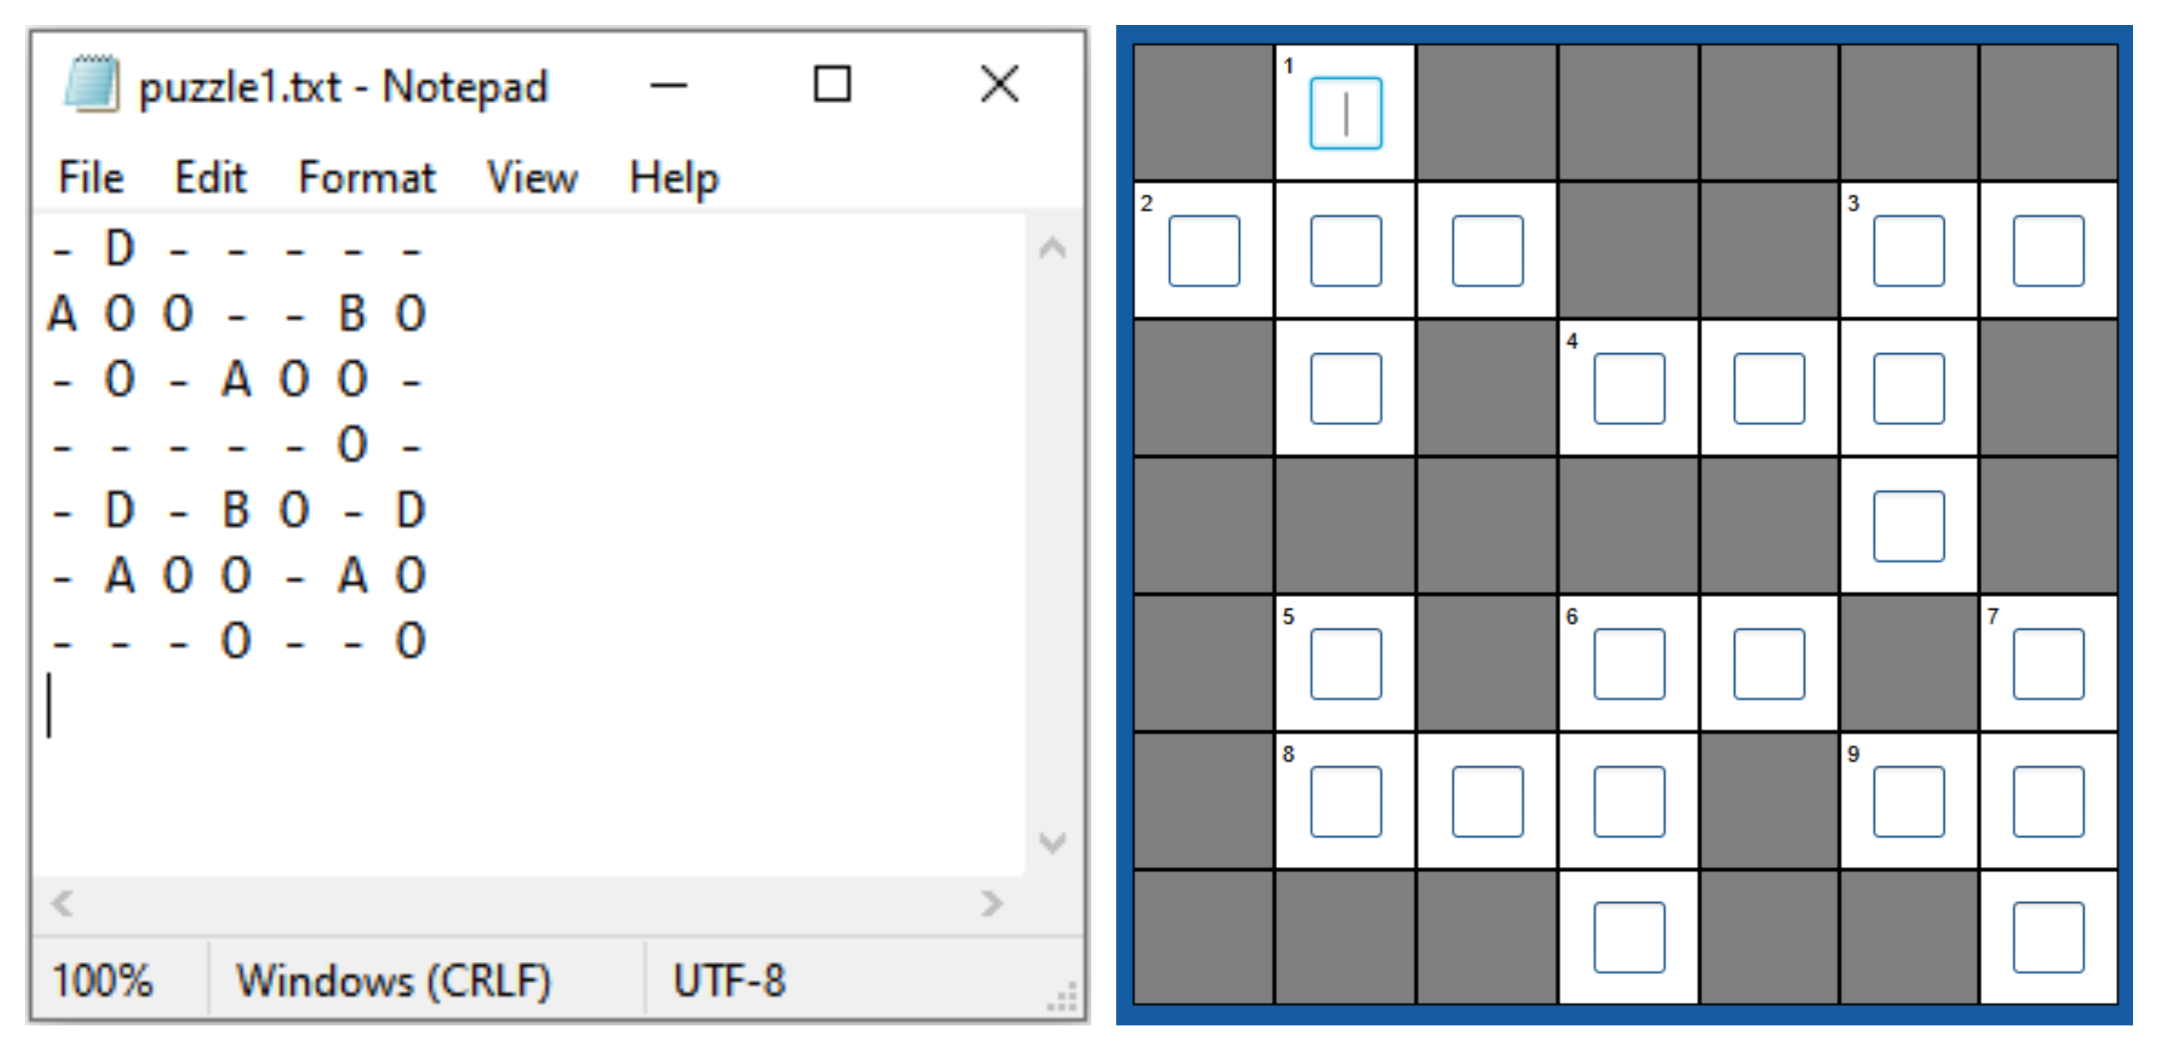
Puzzle templates define the layout of a puzzle. One requirement was that teachers should be able to easily create their own templates without requiring technical knowledge. This was done by having the puzzle templates be simple .txt files containing a grid of symbols. The letters ‘A’ and ‘D’ symbolise the start of a number across and down respectively, while ‘B’ is used for both. ‘O’ is used for subsequent numbers, while ‘-’ represents cells that are not part of the puzzle.
Once the program has loaded a puzzle template and created a corresponding 2D array, it then fills the array with random numbers. This is done by iterating over the puzzle template. Whenever a cell with a special character (A, D or B) is found, the program will follow the array (across, down or both), filling it with numbers. If it comes across another special character while doing so, it will recursively fill it as well. The result of this process is a 2D array filled with numbers according to the puzzle template.
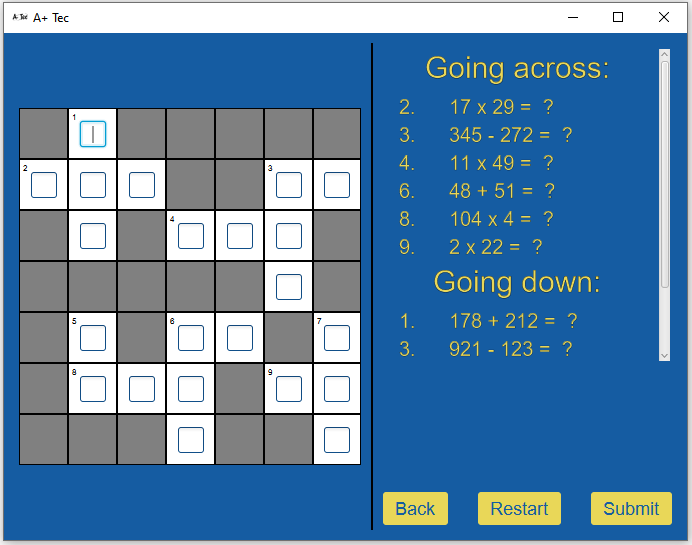
The array represents the answers, so the next step is to create the questions. Once again this is done by iterating over the puzzle template in order to “find” each number in the puzzle. Once a number has been found, an operation (addition, subtraction, division or multiplication) is randomly chosen. A caveat here is that multiplication cannot be chosen if the number is prime, as this would result in a rather boring question. The last step is to pick the operands of the equation, such that when the operation is applied to the operands, the result is the desired answer. This is done slightly differently for each operation, but requires generating a random number - within certain bounds - to act as the first operand and then reverse-engineering the second operand.
Once all the questions have been created, the crossnumber puzzle has been successfully generated and can be displayed.
As you might have picked up on by now, the process involves a lot of randomness. This ensures an endless supply of questions and answers, so that students are always presented with new problems (without requiring teachers to manually create them).
Solving the puzzles
When a student presses the submit button, they are given feedback on which numbers they have filled in correctly. This helps them spot their mistakes. Once the puzzle is solved successfully, additional feedback such as time taken and the number of mistakes made are shown. This helps teachers set goals for students to work towards and can be used as a measure of improvement over time.
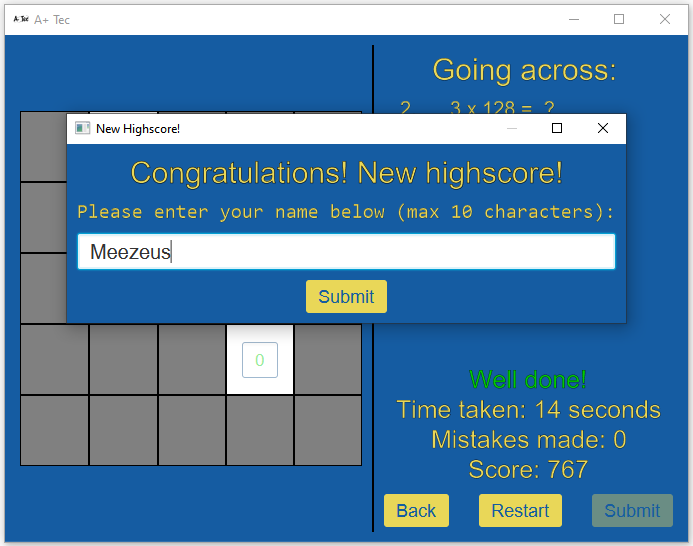
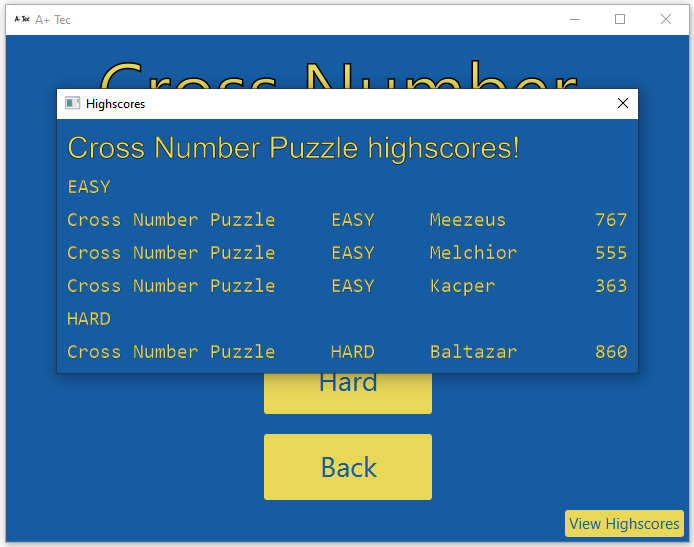
As part of the gamification process, each successful solve is also given a score, with highscores being visible on a leaderboard. A bit of friendly competition is always a great motivator!
Reflection
Before this project, I had limited experience in building applications with GUIs. I decided to use Java and more specifically JavaFX for this project because it’s the only GUI library that I had some experience in, having covered it somewhat at uni. However, there was a lot to learn still: luckily this project gave me the chance to do just that. One challenge in this area was scaling the GUI elements to work at different screen and window dimensions. I managed to solve this by defining the initial sizes based on the screen dimensions and then using change listeners to scale the sizes as the window size changed.
Since I wanted to eventually share this project with others, I had to learn how to package it together into some sort of .jar or .exe so that non-technical users could run it (I ended up using Maven for this). However, the program also had to work from my IDE, so I had to write code to check what sort of environment the code was running in. Furthermore, I also tried to make sure that the program works on other operating systems. I found all of this to be very challenging, as it was something that was completely new to me. I was mostly successful, but I will admit that I don’t fully understand everything that I did. I also doubt whether the way I have gone about things is the “correct” way of doing it. For a first attempt, I think I did a decent job, but this is definitely something that I will need to learn more about in the future.
Another new area that I looked into during development was code obfuscation. Since I was writing code for the company I worked for and not for myself, I thought it might be prudent to try and protect it in some kind of way, so as to prevent people from copying or modifying it.
In addition to all the above, some other things that I learned about during development include:
- How to save Java objects to a file by converting them into a byte stream using serialisation.
- How to create folders and copy files.
- How to play sound clips.
- …and much more!